Family Life

How Tos

Reviews


Wednesday, April 30, 2014

Lemon Blueberry Cupcakes


We tasted, then we tasted again, then we tasted a third time JUST IN CASE.  The verdict is in: these are the BEST CUPCAKES EVER.  Seriously, my genius sister in law suggested the flavor, and I just put a few tweaks into my favorite cupcake recipe and VOILA! These amazing cupcakes were born!

They aren't too sweet, aren't too tart, have PLENTY of punchy flavor, are easy to make, moist, and fluffy!  These are definitely our new favorite after dinner (or after lunch, or just any time) treat!

Why are you still sitting there, haven't I completely sold you guys on these things?! Get off your bum and go back a couple dozen! 


Lemon Blueberry Cupcakes


makes: 2 dozen
prep time: 20 minutes
bake time: 20 minutes
time to frost: 20 minutes

Cupcake Ingredients

  • 1 3/4 cup cake flour
  • 1 1/4 cup all purpose flour
  • 1 3/4 cup sugar
  • 2 1/2 tsp baking powder
  • 1 tsp kosher salt
  • 1 cup butter, room temperature, cut into 1/2 inch cubes
  • 4 eggs
  • 1 cup milk
  • 1/4 tsp vanilla
  • 2 lemons, juiced and zested
  • 1 cup blueberries
 

Frosting Ingredients

  • 2 sticks unsalted butter
  • 8 ounce package cream cheese
  • 4 cups powdered sugar
  • 2 lemons, juiced and zested
 

Directions

  1. Preheat oven to 350F
  2. Add flours, sugar, baking powder, and salt and lemon zest to stand mixer with blade attachment.
  3. Slice butter into tablespoons, drop them in one chunk at a time, once all the butter is added allow the mixer to incorporate the butter for 5 minutes or so until mixture resembles cake mix from a bag, or grated parmesan. 
  4. Add eggs one at a time, then add milk, lemon juice and vanilla.
  5. Remove from mixer, then stir in blueberries by hand.
  6. Line 2 muffin tins with cupcake liners, then evenly distribute batter.
  7. Bake in oven at 350F for 15 - 20 minutes, checking frequently. Overcooked cupcakes are nobodies friend.
  8. Once baked, remove from oven and allow to cool.  Once FULLY cooled, start with frosting.
  9. Beat butter and cream cheese together for 5 minutes or until well incorporated and smooth.  Add lemon juice and zest. Then add sugar one cup at a time.
  10. If texture is too stiff add a little milk until appropriate texture.
  11. Frost and enjoy!


Read more ...

Easter for the Browns


Its Easter for the Brown family and only a week late!  Last weekend I was busy hosting Easter Dinner, a murder mystery party AND unpacking from our trip to NC so I was a bit too overwhelmed to plan a fun Easter morning for the family as well and decided to delay the holiday!

I couldn't be happier with the results, although if I plan to do this again I should definitely wait to buy Easter baskets until after they go on clearance after the holiday.  Lesson learned! 

We had a great Easter morning prolonging a family tradition of leaving riddles to solve in order to find your Easter basket.  Papa Brown woke up to a balloon with a clue tied to it, instructing him to get his Easter basket hunting companion and solve the first clue!


The first clue led to the chicken coop which led to the next clue and so on and so forth until all the clues were solved and the Easter baskets were found!


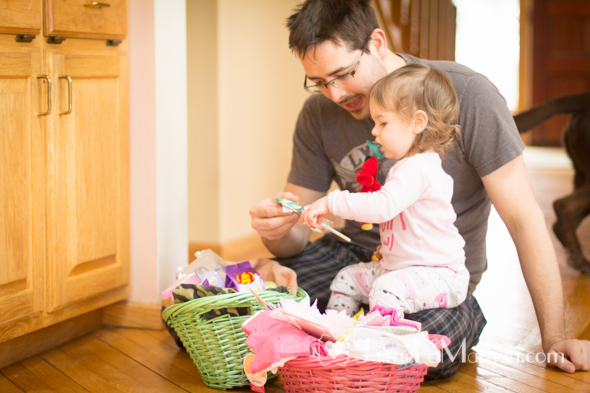
Jaylee's Easter basket was mostly clothes, a couple of homemade treats, and some fun summer accessories like hair bows and sunglasses.  Papa Brown's was mostly lots of candy for the two of us to share.  The whole family had a great time, with Papa and the little one hunting around and I had a great time watching them!  Afterwards we even did an indoor Easter egg hunt since it was a bit chilly outside and Jaylee was terrific at carrying her basket around and collecting plastic eggs into it.  She didn't much care for the Easter candy, she had more fun unwrapping the Cadbury Eggs than actually eating them, but she did LOVE eating her very first store bought Peep!


Read more ...

Wednesday, April 23, 2014

Homemade Peeps


This has EASILY been one of the busiest Easters of my life, so we decided to push the family Easter celebration a week to give me a few days to catch up on some homemade Easter goodies.  That said, I know this post is a bit too late since MOST of you celebrated Easter a few days ago but I'm
hoping this might be helpful for you guys next year (or you can be cool like me and just keep celebrating spring for however long you feel like!)

In light of that I have this fabulously easy, fun, and oh so cute homemade peeps recipe to share with you!  Seriously, the whole thing takes about 25 minutes, start to finish and 15 of that is waiting for your mixer to finish doing all the hard work.

It will take a little longer if you choose to make your own colored sugar like I did, but really still not much time at all.  Plus look how ADORABLE the finished product is, and as an added bonus you can make them and flavor/extract you have on hand (vanilla, peppermint, orange etc)


Home Made Peeps

Inspiration: Why Martha, of course!
Total Time: 25 min
Makes: 15-20 peeps

Ingredients for Colored Sugar

2 cups white sugar
Liquid food coloring drops
 

Ingredients for Peeps

1 packet gelatin
1/3 cup cold water
1/4 cup water
1 tbsp. light corn syrup
1 cup sugar (white or turbinado, whatever you have on hand)
1 tsp vanilla
 

Directions

  1. Make the colored sugar first by simply mixing sugar and food coloring, I did it in my stand mixer with the whisk attachment but I've seen it done in a jar or in a bag as well.
  2. Prep the gelatin by put it and the 1/3 cup cold water in the bowl of your stand mixer.  Allow to hydrate while you make marshmallow for piping.
  3. Combine 1/4 cup water and 1 cup sugar in a small saucepan over medium high heat.  Stir continuously while sugar melts.  When sugar starts to boil, stir in vanilla and corn syrup once combine, stop stirring and place a candy thermometer into the bowl.  Continuing to stir may cause the sugar crystals to reform which isn't good.
  4. Wait while sugar mixture comes up to the soft ball stage, 238F 
  5. Turn the stand mixer with whisk attachment and gelatin in the bowl on to the lowest setting (speed 2).
  6. Slowly pour 238F sugar mixture into the bowl.  Allow to stir for a few minutes, then bring the speed of the mixer up to medium high (speed 6 or 8).  Whip until stiff peaks form, about 15 minutes.
  7. Meanwhile prepare two piping bags with a large round tip, if you have a 1/2" round tip that will do nicely otherwise a standard tip fitting (the white plastic piece you use to hold a piping tip on to the bag) without any tip attachment will work.
  8. Prepare a baking sheet by lining the bottom with an even coating of half of your colored sugar (about 1 cup).  Reserve the other half of the sugar for sprinkling over your peeps.
  9. The texture of the whipped marshmallow is the foundation of these peeps, too hot/droopy and you won't be able to pipe anything but blobs, too stiff and you will just be able to pipe something that looks like bunny poop.  Once you get nice stiff peaks, immediately put the marshmallow into piping bags and GET TO PIPING as quickly as you can.  That said, once you see stiff peaks forming in your mixture as shown below, pull 1/4 cup of mixture and place into a small bowl, set aside.  Pour the rest into the two prepared piping bags.
  10. Begin by piping a single ball onto your sugar lined baking sheet, about 2" in diameter, this will be the body.  Next pipe a smaller 1" ball on the upper right of the first ball this will be the head, and another 1" ball on the bottom left of the first ball, this will be the tail.
  11. Finally pipe two lines across the top, these will be the ears.

  12. Dip your finger tip in a bowl of water to moisten, and use your moist finger to pat down any peaks that formed during piping. 

  13. Toss reserved sugar on top of bunny to coat.

  14. Continue rapidly making the rest of the bunnies, I might suggest having a partner use the other piping bag to simultaneously pipe additional bunnies.  The temperature is CRITICAL here and as the mixture cools off, it will become MUCH harder to pipe. 
  15. Once all the bunnies are piped and coated in sugar, find that reserved 1/4 cup of marshmallow and add food coloring until its darkly colored (black, purple, gray, or brown are all good colors) 
  16. Using the tip of a skewer or toothpick, dip into the colored mix and dab on eyes, and nose.


Oh, one last tip, if you get tired of making bunnies, or your marshmallow was too soft or too hard, don't worry, sugar coated marshmallow blobs (I call them marshmallow "Easter Eggs") are actually 5 times tastier :-)
 

Read more ...

Tuesday, April 22, 2014

Easter Dresses!


I know its ridiculous and I don't care, I LOVE matching mommy/daughter outfits.  Seriously LOVE them.  I'm hoping for Christmas one year to have a whole army of family in matching pj's on Christmas morning, I think the photo will be one of my FAVORITE cheesy family moments of my entire life.

Unfortunately for me, most of the world doesn't share my excitement for trans-generational coordinating attire so it was more than difficult to track down matching mommy/daughter dresses for Easter.  But fear not!  With a little bit of a can-do attitude and the help of Scientific Seamstress/Sis Boom you too can have matching dresses in ANY COLOR YOU WANT!

 
I decided to bust out the ol' sewing machine for this little project and I am just SO GLAD I did.  I have to admit that I am LOVING the 21st century and the prevalence of PDF patterns these days, I picked up the patterns for our dresses over on Etsy (mine is the Jamie dress, and Jaylee's is the Marissa dress) and the detail of the sewing instructions is out of this world.  While I did grow up sewing with my mom, my skills tend to get a little rusty in between projects and this pattern was GREAT at reminding me what to do, and what not to do.  Plus it was a pretty simple pattern to use with only 6 pattern pieces to cut out.  It took me about an hour of cutting per dress, and about 4 hours of sewing.  I'm sure it would have been even faster if I was a daily sewer. 


The pattern super simple, and she walked you through when and how to baste, where to pin, and how to line everything up perfectly. 


One of my FAVORITE parts about this dress was that there wasn't even very much ironing to do!  I swear when I sew I usually spend more time ironing than sewing!

 
I finished up my dress first, it was pretty quick to throw together, I did it over a few days during nap times.
 
Next I made Jaylee's dress, I expected it to be a lot quicker because it was smaller but somehow that's apparently not how sewing works!  This being only the second dress I've made for her I realized that I'm definitely going to need to get a child sized dress form because apparently toddlers will NOT stand still for you to take a photo of the dress on them!
 
It was a really awesome experience, it was super fun and easy, and we got SO MANY compliments when we wore them for Easter!


Read more ...